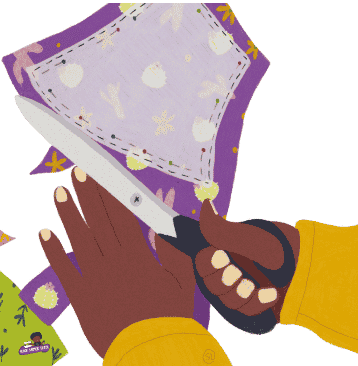
Sewing with Sheets: Comforter Coat, part 1

0.75x 1x 1.25x 1.5x 2x 0:0000:24:32 Sewing with Sheets: Comforter Coat, part 1

1x
0:00
00:24:32

Episode Summary

Listeners journey with Lisa as she contemplates, commences and, despite its ups and downs (pun intended), remains committed to the sewing of her bright and beautiful winter 2021/2022 comforter coat.   Play-by-play archived audio supplements narration by our beloved and intrepid host.   Through a sometimes winding process, bedsheets become tubes, basic batting and questionable quilting are reinforced- or reinfeathered- and a comforter becomes a coat.  Join Lisa for the first installment of her full comforter coat adventure!

Episode Notes

Read Full Transcript

Lisa Woolfork 0:09

Hello stitchers. Welcome to Stitch Please the official podcast of Black Women Stitch, the sewing group where Black lives matter. I'm your host, Lisa Woolfork. I'm a fourth generation sewing enthusiast with more than 20 years of sewing experience. I am looking forward to today's conversation. So sit back, relax, and get ready to get your stitch together.

Hello, everybody, and welcome to the Stitch Please podcast. I'm your host, Lisa Woolfork, and I am so excited to talk with you today about sewing with sheets. Now, I really love alliteration, that's when the sound of letters sound the same at the beginning. So 'sewing with sheets' really appealed to me. But at the same time, sheets are really just fabric, so I am really excited to talk to you about sewing with sheets, in particular, walking you through my process of sewing a winter coat out of a comforter. So I knew I wanted to make a winter coat because I make a coat pretty much every winter. And I want it to be warm. And I've been seeing these really nice puffer coats, they call them puffy, puffy or puffer, because they have like little pillows in the squares. And so actually the way that you make one, I found a pattern from VikiSews, which is a Russian language pattern. She's from Russia. And she also has them in English for someone like myself who does not speak or read Russian. And it was a great looking coat. And so I was reading the instructions, and it said that you needed to make little pillows. When you look at a puffer jacket and you see the different quadrants or squares on the piece, those are actually stuffed. I did not want to stuff anything. And so I said, "Self, what could you do instead? What could you do that would give you the effect of a puffer jacket without doing any of the puffer yourself?" And that's when I thought "comforter." My sons have these down or down alternative comforters that they've had on their beds. I think we got them from...I think they were a gift from my mother-in-law actually. And they've been on their bed since they were little. And it's just like a regular, nice smooth cotton percale fluffy down- a little less fluffy now because it's been years since they've had them. They held up. I was like, "that'd be great to make a jacket out of that or coat out of that." And so I started to think about what type of fabric that I would like. So when sewing with sheets, I think it's important to remember that sheets are just fabric. And in the same way that you would use any kind of cotton fabric, you can use a sheet.

I bought this comforter new online, and have been really happy with it so far. I am very excited to make this coat from this Marimekko comforter. I am believing that the man Marimekko comforter will be quilted, which will save me time and having to quilt the three layers of what would be a regular, puffy or puffer coat jacket. What you are listening to there, friends, is my rugged optimism that choosing a comforter was going to be easier than quilting it all myself. That is the mindspace I was in when I first got the comforter. The purpose, remember the purpose, was to make it easier, make it easier. The reason that this is part one of the comforter coat episode is because, as it turns out, I did not make it easier. This is to introduce you to my process of making this coat. So I decided to get a Unikko, which is the design, Marimekko, which is the company, comforter. I found it online. The size of a king comforter, in case you were interested, is let's see, the cotton King comforter is 108 inches by 92 inches square or I guess more like a slightly short rectangle. And when I got it, it came in this huge box, like a really huge box. So here's a clip of me opening the box when it first came to the house. My first step was, as I do with most of my boxes, is I kick them down the stairs. Sometimes I slide them gently down the stairs. But sometimes I just kick them down the stairs. It was a box with a comforter in it. Like what was the worst that could happen if I kicked it down the stairs? -nothing, not a thing. I kicked it down the stairs, and it turned out fine. And then I went to open the box.

It came in a huge box. The box is 22" by 22" by 13". It is huge. It, compared to a refrigerator, is not big. But compared to a sewing pattern or six yards of fabric, it is very big. So the box itself is, like I said, nearly two feet tall and a foot a little more than a foot across. And I'm thinking, "Oh my goodness. I hope this works out."

So I'm preparing now to open the box. It says "do not use a sharp instrument." Oh, I'll just pull the tape. [sound of ripping tape]

This is a very big box. It says "thank you for shopping at overstock.com." You're welcome. Your price was the cheapest. Oh, oh, looks so good. Oh my gosh. Oh, oh, it looks so good. [rustling noises] It's so bright and beautiful and huge. Oh man, this is gonna be a great coat if I can make it a coat. So the first thing that occurs to me, in addition to this being huge, is I'm not seeing where it is quilted. I'm just not seeing the quilting lines. So I'm looking at the, I'm unzipping [zipper noises] and pulling it out. And it looks like it's double sided. Maybe it is bonded somehow? I don't...I'm trying to understand how it's quilted. Oh, look at the binding. I don't know, this seems very promising. Okay. Lightweight. I think if I had to do quilting that I would have to do isn't going to be that bad. Oh, you know, what'd be amazing? -if I could put it on a long arm machine and just do outline quilting around the pattern pieces, the big pieces, but I don't have that. But wow, my first reaction is "Wow."

You're listening to the Stitch Please podcast and the first part of the Comforter Coat episode. When we come back, we'll talk more about the coat, including finding the sheets to make the lining and figuring out how much quilting we actually need to hold this thing together. Stay tuned.

Hey, friends, hey! What are you doing on Thursday around 3pm or so? You got 30 minutes to hang out with Black Women Stitch? You got 60? If so, come through for 30 minute Thursdays. Thursdays 3pm. EST you can chill with Black Women Stitch on Instagram Live or talk with us through the two way audio on Clubhouse at 3:30pm. EST. That's Thursday for 30 minutes. Come hang out, chill and have fun with us. See you Thursday.

You're listening to the Stitch Please podcast. And we're talking today about the comforter coat that I recently finished, made from a king size Marimekko comforter. In the first section we talked about what I was thinking when I decided to use a comforter and unboxing it. And now we're going to talk about finding the sheets that I used as lining and taking apart the garment-or taking the piece apart-in order to make the element I needed for the coat. Stay tuned.

Before I start on the coat, I'm going to make a muslin. And I was trying to find enough fabric to do that with and I pulled out some old fleece, and it's a big coat. It's really oversized, and so I need a lot of fabric. And so I was looking and looking, and I was like, "I don't want to use that. I don't want to use that." And then I remembered, "I have a sheet set from Ikea [rustling noise] that I got a little while ago. It's a twin sheet set. And I think about what the size, the dimensions are...It says something. I think this might be the duvet cover. 64" by 86". So I think multiply that twice. That should be- cuz you know, one's for the top and the bottom- I think that should be enough to get a muslin of this coat. And now I'm like, "Oh no, do I really want to use these sheets? Because these could be something really good for the spring."

"No, Lisa, use those sheets. How long have they been sitting there...? You might as well use them."

So now, hilariously, I am making a draft of my comforter coat from a set of sheets. And my plans for about sewing with sheets episode is complete. More mwa-ha-ha-ha!

One of the things that I forgot, maybe I just blocked it out, was that when you're sewing with sheets -well maybe not so much with sheets- but with the duvet cover, you got to take it apart. The same is true for the fitted sheet, you have to take out the elastic [fabric ripping noise], and that takes a minute. And so I was like, "Hurray, I got my sheet." And then I was like, "Oh wait, my sheet is actually a duvet. And my duvet actually has a lot of very well constructed seams in it. So I have been sitting here pulling apart what I thought was a sheet when I pulled it out and trying to find all the little parts that I need to get to So I can open it up flat like a gigantic piece of fabric that it really is. And that it's just taken a little bit longer than I thought, because I don't want to just go in there and cut it and start hacking away. So it requires [seams ripping] a little unsewing, and for me to get friendly with the seam ripper.

I don't know if unsewing is my least favorite part of sewing. But if it's not, it's close. It's very close. Okay, now I've gotten to the end of what I think is the last seam. And because it's cotton, and I don't know, I'm not sure if this is a serged seam. This looks like- Uh [counting under breath] oh, wow, this looks like it's just a three thread serger just wide. Anyway, it's coming apart pretty easily when I pull on it and leaving a lot of fluff. [more ripping, rustling]

Now, I think- I'm covered in thread- but I think I've got it all flat. All right. Here we go. It's time to get cutting. Whew!

So I have cut the comforter, and I'm looking right now at the stacks of the six basic pieces that make up the coat. The comforter is not very well or thoroughly stitched at all. It has two inch tacks, a row of stitching that's about two inches long, and it is dispersed throughout the coat very widely. Usually when you are meant to hand tack a quilt or something. You want it to be measured by like a palm’s width. You put the palm of your hand down, and then you will touch another tack. They don't care about palm’s width. I'm looking at this one piece [laughs] of this coat, and it is about 40 inches- let's see from 30 to 70. So yeah, it's like 40 inches long. It's a very long piece. And I'm looking at it and let's see, there's one tack, one tack that separates 40 inches of fabric. One tack. If you're a quilter, you realize that this is some nonsense. This is not at all how it's supposed to be. This is not how you hold a quilt together. But apparently this is how you hold a comforter together, because you all will not believe it when I tell you how little is holding this thing together. Absolutely a teeny tiny amount is holding it together. So that's been interesting to look at and to think about. But I'm really excited about how this has turned out. And so that's the little report on looking at all these pieces. My next step is to mark the stitching lines. It's coming along!

So apparently one of my favorite things is to take a project that's meant to be easy and instead, make it really hard. One of the purposes of getting the comforter was that I did not have to quilt anything or layer anything. I was like, "Oh, that's gonna be great. I will just go ahead and use this quilt. I'll quilt it up. I'll put the comforter, and it'll be fine. But then, I was like, hmm, After all the quilting, the sides are still open. And basically what I've created is channels, and I was out with a friend for coffee, and she said, "I have all this down. You could stuff your coat to make it a puffy coat with down feathers." And I was like, "Whoa, I could do that." And so I'm looking at my comforter now and the very synthetic batting that is not promising a whole lot of warmth, and preparing to make stuffing for this coat. So to do that, I have to tear fabric. [fabric rustling] and ripping]

And the reason [fabric tearing] then that I'm tearing this fabric is that when you tear it, it's going to be straight. And I'm going to make a really long tube, a long tube. I'm just measuring it right now. This tube will be at 88 inches, which is a little more than two yards. Well, I guess it's a lot more than two yards. 88 inches, two yards is 72. 72 from 88 is 14? 72 from 88... 16. I did it. I mathed. Anyway, that's close to two and a half yards of tubing that I'll get. And what I'm using is a duvet cover, the same duvet that I made the muslin from. And so I'm hoping that I'll only need two, maybe three at most, of the tubes. Because I imagine trying to stuff them is not easy, but I think I'm gonna make a little video, maybe time lapse it just to see how long it takes. I'm also going to be covering my hair and wearing a mask, because I think this feather stuffing situation is going to be a hot mess. And I want to get it over with. Okay, when I make the long tubes, what I'll do is I'll seal the bottom, sew the bottom shut, and then I'll stuff the tubes with down. And those tubes then I can sew on the down like double seams, and then just cut the seams apart. And it'll just make the fitting into the garment easier. That was an idea that the spouse of the friend who had the idea to give me the down had. I was like what a great idea. So shout out to Rob and Adrienne, those was great ideas. Okay.

You're listening to the Stitch Please podcast the part one of the Comforter Coat episodes. This episode we talked about unpacking the comforter. My surprised at how poorly quilted it was. There was a lot of space and my decision to make the coat even warmer by making 5011 teeny tiny down pillows to put into the chambers of the coat that I would stitch. The pillow plan that I described worked very well. It really did. The challenge came when I went to cut it apart, I only did a straight stitch, a very small, small straight stitch, but it was a straight stitch. I believe I would have been better off if I had done a really tiny zigzag or even a satin stitch. And I say this because what I've noticed is the feathers migrate, they have sharp little tiny points and they wiggle themselves out. Now, luckily, the duvet cover that I used was a sturdy cotton. So they're not poking through the fabric of the pillows that I made. They're poking out of the seams. So I didn't realize until after I had finished all the pillows, and I was short, quite a few pillows with my math, I was really off. And I overstuffed the pillow. So there was a lot of little things that I'll talk about in the next time. There's a lot of little things that I'll talk about as being useful lessons that I learned. But if you want to learn more about the coat, go to Instagram, go to the Black Women Stitch Instagram page and click the highlight reel, which is at the top of the Black Women Stitch page. And there is a circle there labeled "Comforter Coat". And if you select that, it will take you through the entire journey from beginning, unboxing stuffing pillows, making pillows, unmaking pillows. . . The whole journey including the completed garment and the victory dance is located right now on the Black Women Stitch Instagram page in the highlights. So thank you so much for joining. Come back next week, and we will help you get your stitch together.

You've been listening to the Stitch Please podcast, the official podcast of Black Women Stitch, the sewing group where Black lives matter. We appreciate you supporting us by listening to the podcast. If you'd like to reach out to us with questions, you can contact us at blackwomenstitch@gmail.com. If you like to support us financially, you can do that by supporting us on Patreon, P-A-T-R-E-O-N, and you can find Black Women Stitch there in the Patreon directory. And for as little as $2 a month you can help support the project with things like editing transcripts and other things to strengthen the podcasts. And finally, if financial support is not something you can do right now, you can really help the podcast by rating it and reviewing it anywhere you listen to podcasts that allows you to review them. So I know that not all podcast directories or services allow for reviews. But for those who do, for those that have a star rating or just ask for a few comments, if you could share those comments and say nice things about us and the Stitch Please podcast, that is incredibly helpful. Thank you so much. Come back next week, and we'll help you get your stitch together.

Hosted by Lisa Woolfork

Lisa is a fourth-generation sewing enthusiast who learned to sew while earning a PhD in African American literature and culture. She has been sewing for more than twenty years while also teaching, researching, and publishing in Black American literature and culture.

You may also like...

error:

Discount code SEWBLACKQC for 20% off at Spoonflower and 10% off at Crimson Tate.