[00:00:00] Lisa Woolfork: Hello, stitchers. Welcome to stitch, please. The official podcast of black women's stitch, the sewing group, where black lives matter. I'm your host Lisa wool fork. I'm a fourth generation sewing enthusiast with more than 20 years of sewing experience. I am looking forward to today's conversation. So sit.
[00:00:21] Lisa Woolfork: Relax and get ready to get your stitch together.
[00:00:40] Lisa Woolfork: Hello, and welcome to the stitch pleased podcast. Today's topic. We are gonna be talking about marking tools. This is part of a series that we've been doing back on episode 19. We talked about marking tools and I talked about fion pins. I believe that was the last episode of February, [00:01:00] 2020. You can go back and listen to that episode as well as check out links to the, um, Pens themselves, the pens, the markers, the stamps that I was talking about in the show notes, if you're interested in those today's topic is about marking tools and the theme is wheels and wax wheels and wax.
[00:01:19] Lisa Woolfork: And I'm talking about wax transfer paper. I'm talking about wax free. Craft, um, wax free papers, tracing wheels, and just some general howtos to use these things. And I'll talk, I'll be talking about the good and the bad and the. Dis ju did not work for me ever, um, of, of marking tools that are, um, wax based.
[00:01:44] Lisa Woolfork: So one of the things I wanna begin with is why I U why I use wax and one of the first experiences that I had with it. And this was an. Uh, not great experience. And it was 100% operator error. Um, maybe about 15 years ago, [00:02:00] maybe, maybe earlier. Um, maybe longer I was in the garment district at maybe one of the trim shops, Pacific trimming or something like that.
[00:02:07] Lisa Woolfork: And they had a bunch of paper that was wax on one side and white translucent on the other side. And they said that this was for pattern transfers. Now I believe what they meant was. To transfer a pattern that one had designed and drafted into another shape to then be cut out. What I thought it was for was to draw darts and marks and those kind of things on fabric.
[00:02:31] Lisa Woolfork: And I proceeded to do that and use that for years, even though it was a terrible idea because wax does not come out of your clothing. And I ruin some pretty nice garments by putting like bright red. Dart marks on the inside thinking that it wasn't gonna be seen and it was totally, absolutely seen. And so, um, I still have some of those pages still to this day.
[00:02:57] Lisa Woolfork: I still have some of those sheets of the [00:03:00] wax, um, that I could use for the intended purpose and not for the very. Badly decided, modified purpose that I chose, but what, what I have, what I have found to be better after I had that fiasco was the wax TRAC, wax free tracing papers. And these are double sided papers.
[00:03:21] Lisa Woolfork: And the purpose of using them, the things that I really enjoy using them for is to mark darts and to. Pleats. I also use them to mark, um, dots in fabric. Like if a.is a, a large dot or large, large circle or small circle. And so I wanna talk today about these wax transfer papers, the wax free papers that I have been using, and one with great success and one with terrible success.
[00:03:49] Lisa Woolfork: And so the first one was the, was the DRS double sided wax free. And I would buy that. What felt like for almost every sewing project, [00:04:00] because I know people enjoy using Taylor's tax to mark their dots. I'm sorry to mark their darts. And that's when you draw, um, like a basing stitch through the different points of the darts or the legs of the darts, and you can measure and create your dart that way.
[00:04:19] Lisa Woolfork: And that doesn't require any tools. No, it doesn't require wax. It doesn't require. Um, chalk, which is next, the next, um, installation in this marketing tool series will be about chalk. Um, it doesn't require chalk. It just requires you to use some basic hand sewing and to be able to follow. I suppose a line that is, um, that is like, meant to, that is drawn between the, the points that have been stitched out with the Taylor's tax.
[00:04:49] Lisa Woolfork: It's difficult for me to explain how Taylor's tax work because I have a, I find them impossible to use. Okay. Again, this does not mean that they are bad. This is, this means that [00:05:00] I have a limitation in my own sewing that prevents me from using Taylor's tax with great effectiveness. I need to draw my darts.
[00:05:10] Lisa Woolfork: I need to trace them. And I need to stitch on the line as they are drawn on the pattern or stitch on the line after I've modified the dart or moved it or done whatever that needs to happen. And the line I really need to sew on the dotted line. That's that's the kind of Soest I am, I guess I can't wing it.
[00:05:30] Lisa Woolfork: And to me, without having a line that I can see and follow, um, that feels like winging it to me now, again, other folks have had great experiences Taylors I'm telling you Taylor's tax have been around far longer than wax. Tracing paper. So this is, this is an, a, a, a very, um, old te not old is the wrong word, but it's a, um, a couture, I would say a couture technique.
[00:05:59] Lisa Woolfork: I believe [00:06:00] that if you're, if you are very skilled at sewing, that something that you will do is use Taylor's tax. Um, and so I think that that's just an important consideration to kind of keep in mind that there's another way to do it, but for me, Wax the wax free paper was the way that I had chosen to go because I needed to follow the lines.
[00:06:22] Lisa Woolfork: And so one of the challenges for me with the dreads paper that I found was that I found it very difficult for the marks to actually transfer to the fat, to the fabrics that I was using for the garment. It would. You know, like it would make some of it, they came with about maybe four or five different colors in a pack, but I couldn't get any of them to show up on any fabric.
[00:06:43] Lisa Woolfork: And so I would say, oh, well I guess this one's no good or it's too old. Let me go buy another one. Oh, I guess this one's no good or too old. And I throw that one out or I'd leave it in the bag or I'd say, well, maybe I can only use this red one, but the yellow one isn't gonna work. [00:07:00] You know? And so that was pretty frustrating.
[00:07:03] Lisa Woolfork: And so eventually I came to find another way of, of using that, uh, of not another way using that paper. I had to stop using it entirely, and I found a different method and I found a different, um, a different brand of paper to use. And that is thesal brand paper, S a R a L. I went to, um, the 54 40 African American quilt Guild retreat back in 20.
[00:07:34] Lisa Woolfork: 18. And, um, I had taken a class and one of the requirements for transferring some of the materials was using that paper. I had never heard of it before. I'd never seen it. I know I saw that it came on rolls. It came in a pack and I had never used it before. And when I did, it was like a light bulb turned on over my head and it was like, oh, Like who [00:08:00] knew that this could be so easy.
[00:08:02] Lisa Woolfork: You put the marks down, the marks are not permanent, but they're bright. They, they brush out. If they don't brush out, they wash out and they show up for me, which is useful on dark fabrics. I sew with a lot of dark fabrics, um, and. Especially a lot of fabrics that have multiple prints on them. And so it'll be a bunch of different colors in the, um, in the pattern of the fabric, which makes it difficult for me to draw a line that I can see when I move, for example, from region to region in different parts of the exact same material.
[00:08:37] Lisa Woolfork: So that seral paper worked so well and it still works well. And so I have been using that. Ever since, um, it really has completely revolutionized how I use wax or the wax free tracing paper. Um, and then when you partner that with these tracing wheels that I have, um, you get a really fun. [00:09:00] Result that for me, um, generates a kind of precise sewing that I really appreciate.
[00:09:05] Lisa Woolfork: So when we're gonna take a quick, quick break, and when I come back, I'm gonna talk about the two different types of tracing wheels that I'm using as well as give some detailed instruction on how to use wax free tracing paper in your own sew. Stay tuned
[00:09:35] Lisa Woolfork: here. It's ditch, please. The official podcast of black women. Stitch, we talk a lot about sewing, but if you want to see and not just hear about some of the things we've been discussing, feel free to join us on the socials. You can find us at stitch, please. On Facebook and you can also find us on Instagram at black women's stitch.
[00:09:58] Lisa Woolfork: You can find photos of [00:10:00] projects that we've been working on. Really interesting social commentary and on Thursdays at 3:00 PM Eastern standard time, you can join black women's stitch for a live Instagram chat. Again, that's every Thursday at 3:00 PM. So find us on the socials. Follow up with us. Are happy to hear your direct messages.
[00:10:22] Lisa Woolfork: You can reach out to us at the black woman stitch page on Instagram, and we'll help you get your stitch together.
[00:10:35] Lisa Woolfork: Hello, we are back. You are listening to the stitch please podcast with a special episode on marking tools and the subject. Is wax and wheels or wheels and wax, I guess we could say wax and wheels because I started talking about the wax first and now I'm gonna transition to the wheels. Tracing wheels are an important feature of working with wax free or even [00:11:00] wax papers.
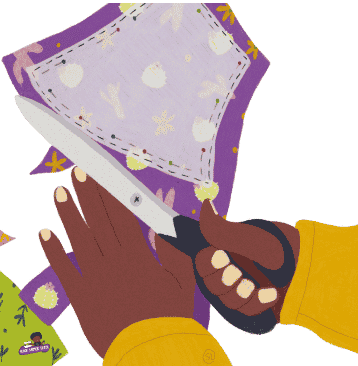
[00:11:01] Lisa Woolfork: It creates the wheel. It's if you imagine like a pizza wheel or a rotary cutter that does not have a sharp blade, but has a very, very dull one. The purpose of a tracing wheel is that you can roll your wheel along whatever line you see in the pattern that you're trying to transfer. Again, the purpose of using the wax or the wax free tracing elements.
[00:11:26] Lisa Woolfork: Are to transfer the markings from the pattern to the, to your fabric. And I'm gonna talk in good detail about how to do this effectively with the tracing wheels. The thing that I think is important to note that is that I have, um, at least three different types of tracing wheels, but the distinctions between them are that one is a solid wheel.
[00:11:49] Lisa Woolfork: Like imagine up a Nick. For example, a us nickel or a coin, uh, wherever you are a coin that is smooth all the way around the edges, right? That [00:12:00] is one tracing wheel. They also make another kind of tracing wheel that's serrated. So instead of the wheel being smooth, the wheel is jagged with spikes and sometimes the spikes are really, really sharp, which you don't wanna use.
[00:12:17] Lisa Woolfork: I have one that I can't use this thing. Lethal, it looks like a SHN, um, like a real live actual weapon. Um, the things are in the, the spikes on it are incredibly sharp and I know it would perforate, um, whatever paper and it would, it would perforate whatever fabric I was using. And it would certainly perforate the tissue pattern, which is something I, which is what I normally use when I'm sewing with like a big four pattern.
[00:12:44] Lisa Woolfork: It would, it would perforate actually printer paper and blueprint paper as well for your printed out PDFs. So there's a, there is a tracing wheel. Like the ones that you, I got this one at the garment district. Maybe I got this one at an estate sale or something, but the, you can find, um, [00:13:00] you wanna get two tracing wheels.
[00:13:02] Lisa Woolfork: And let me tell you why. So the great thing about the, the solid tracing wheel, the tracing wheel that looks like a coin is that when you roll that along the wax paper of your, um, transfer paper, it will create a solid line. A solid wheel creates a solid line. Then if you use the serrated one, the one that has the little, kind of little spikes around it, like, you know, a cartoon drawing of a sun, um, that will create a dotted line.
[00:13:36] Lisa Woolfork: Now, why does that matter? Why do you care? The reason you care is because sometimes you'll see printed on pattern pieces. It'll ask you when you're making pleats to bring the dotted line to the solid line. And so now you'll be able to mark, what is a dotted line? And what is a solid line and you can hold that up.
[00:13:59] Lisa Woolfork: So [00:14:00] when you're going through your pattern instructions, and it says, bring the solid line to the dotted line. You have both lines traced there, and if you're using seral, um, or another brand of wax free paper that is erasable and washable, then you will have those marks right there in front of you. And I absolutely love that.
[00:14:21] Lisa Woolfork: In addition, I wanted to let you know that if you are using, um, using the big four patterns or a tissue pattern, I know for example, sohow seven prints on tissue. Um, a lot, lot of other independent patterns also print on tissue. If you are using a pattern that prints on tissue and you need to mark darts and CLETS, and you're gonna be using a wheel, I highly recommend that you invest in high.
[00:14:46] Lisa Woolfork: Tape high heat tape. I will put a link to it, to the stuff that I use in the show notes and high heat tape is important because what it does is when you tape over your darts, when you [00:15:00] tape over your, um, your, your circles or your Xs and triangles and stuff like that, when you tape over these things, You can then run your wheel, the perforated wheel or the serrated wheel or the solid wheel.
[00:15:17] Lisa Woolfork: And I guess perforated wheel and serrated wheel are the same thing, but you can, um, you can run those wheels over that pattern and it will not tear it up. That is one of the disadvantages people don't seem to like about a tissue paper pattern is that it seems really, um, Um, I'm trying to think of words that don't seem so like punitive, um, that it, it seems like IM permanent, it seems, uh, weak.
[00:15:48] Lisa Woolfork: It seems like it tears easily. Um, they rip easily and that's really frustrating, but the high heat tape. Will really help. And the, the sense I know since if y'all, if you all have been listening to the stitch police [00:16:00] podcast, since the beginning, you know, that I iron all my pattern pieces and that's the BA the best, the secret to get them back in the pattern envelope after you've used a big four pattern, instead of just getting so frustrated, you just wa it all up and throw it all in the trash.
[00:16:13] Lisa Woolfork: You can take an iron. And iron your pattern piece and all the pieces. When I'm doing a garment, I take all the pieces. I put 'em all in a stack. I iron them and fold them and put them and press the folds and put them back in the envelope, which just basically makes new folds for your pattern. If you, you could, you could, of course cover your.
[00:16:34] Lisa Woolfork: Um, your darts and markings with regular tape, except that it would totally get ruined when you, I, when you, when you ironed it. Um, and I think it's a good idea to iron, any pattern before you start sewing. And so, especially like for me, I have a lot of tried and true patterns that have, you know, darts and marks and you know, all these different elements that need to be marked.
[00:16:55] Lisa Woolfork: And so I basically stabilize them. And [00:17:00] reinforce them with the high heat tape. And that's just a recommendation I'd like to make right now. Um, if you want to start using tracing wheels on your patterns, um, invest in some good wax free. Erasable washable, um, paper, like thesal that I mentioned now, I keep saying it like, it's a sponsored post, but y'all know I don't got no sponsors.
[00:17:24] Lisa Woolfork: Um, but it's, it's just something that I like and that I use and it's been very effective. Um, and so. Invest in that and the high heat tape, because the high heat tape will something you can iron again and again, and again, high heat tape is used in sublimation printing and in vinyl work. And like, so when you have to put like your substrate under the.
[00:17:46] Lisa Woolfork: Under the heat press for at 400 degrees for two minutes, you can put the tie heat tape on there and clamp it down and it won't leave any marks or residue and it won't melt. So this is why it'll be totally fine for [00:18:00] your iron. I wanna talk next about the procedures for using the wax free paper. And there's two ways I'm going to discuss this.
[00:18:12] Lisa Woolfork: I'm gonna discuss this, how you use this on the inside of your garment. And how you can use this on the outside. So let's start with the inside. You'll notice when you get the paper, if you buy a sample pack, which was what I did. I started with a sample pack because I wasn't sure if I was gonna like it.
[00:18:30] Lisa Woolfork: And so it came in a sheet that was pretty small. I believe it's smaller than an eight and a half by 11 sheet of paper. And so if you have the paper and you need to do something. What you wanna do the paper, first of all, before I start to tell you about the other aspects of using the paper in a reinforced way, is that you're going to wanna fold the paper.
[00:18:50] Lisa Woolfork: So the wax side is facing out. Then you put the paper that you just folded between the layers of the pattern [00:19:00] and the fabric. And to do this, what I do is I take a piece of, I cut out my shirt front, for example, then. Take off the pattern piece and move it aside. I then slide the outside facing wax papers, the, or the wax free tracing papers and put it between both layers of the garment.
[00:19:23] Lisa Woolfork: So that I have then on the wrong side of the garments, cuz the wrong side is facing in and the right side is facing out. So what you end up with in, for lack of a better phrase is a sandwich, um, kind of. Before you make a grilled cheese sandwich before you put the grilled cheese sandwich in the pan to grill it.
[00:19:41] Lisa Woolfork: You have two pieces of bread on the outside and a piece of cheese or two on the inside. That's exactly what you will have when you start to use the wax paper or the wax free tracing paper in the ways that I've described. And this is where the magic happens. Friends, you then put your pattern. Back [00:20:00] on top of your little sandwich and you take your tracing wheel and applying even pressure, you roll right along the line of one leg of the dart and then roll right along the other side.
[00:20:12] Lisa Woolfork: The other leg of that dart and what will happen when you peel away your pattern paper, you can peel back the top layer of your garment fabric and on the inside, you will see. That you have a perfectly traced dart that you can then pin together and sew because I really am a stickler about dart precision.
[00:20:38] Lisa Woolfork: Um, that there's a, you know, like when you sew your darts, you know, you start with the longer stitch length you in with the tiny stitch length, you pull it back into the like nose tip of the dart to tie it off. All of this helps make for very smooth and clean and rather invisible looking darts. And so for me, the start of that, Is [00:21:00] essential.
[00:21:00] Lisa Woolfork: You wanna start in a good position with your darts in order for them to look nice. And the first step is for me is tracing them accurately. That's something that is really, um, an important part of my practice. Whenever I'm making darts for pants, for shirts, blouses, for whatever, um, because they provide this structure.
[00:21:22] Lisa Woolfork: They are pretty important. And so for me, tracing them properly is key to that. Everybody's different. And this is not to say that the tailor T way or other ways to do it is wrong for me. I found it easier to trace the dart as it appears on the pattern. Um, rather than. Rather than not another thing that you can do, which might be a bit difficult because this tool is like, , it's really old and I've never seen anybody.
[00:21:53] Lisa Woolfork: I saw one other person. Um, we had an episode last year where I talked about, um, pressing versus [00:22:00] ironing and we talked with designer fresh, custom tailoring, and she. Same tool that I have. And it prompted us to talk about like vintage notions, like doing an episode on vintage sewing notions, which I might actually do, because that sounds like it's fun.
[00:22:15] Lisa Woolfork: But this thing that I have is called attack it T a C K dash. It it's pretty, um, It's a pretty vintage tool, I believe from the 1940s or fifties. And it looks like, have you ever, if you've ever seen, uh, the kind of stapler that they use in libraries, a library, stapler is. Instead of having like a six inch throat kind of like the, um, like a standard stapler would have, you know, you, you put your papers right at the tip and then you, you press it.
[00:22:48] Lisa Woolfork: This one, a library stapler will, will have maybe like a one foot. Throat, so it can get, or maybe even 18 inches, so it can get to the middle of books or the middle of a [00:23:00] page or whatever to help repair the book. It looks like that. But instead of having, um, a clamp to kind of bend over the edges of the staple, it just has, um, the point that you tap it down, almost like if you've ever seen an image, I've never seen this in real life, but an image of a, um, Teletype of, you know, the thing to go beep beep beep beep beep beep beep, where they press the button down to, um, send a message Morse code.
[00:23:31] Lisa Woolfork: I forgot. Anyway, my point is if you have that kind of tool, which is something, just one of the things that I have, you can also mark dots on the inside of your garment and the reasons that you wanna do this is similar for the darts. I like to do this double fold method that I just described to you because it lets me.
[00:23:52] Lisa Woolfork: Both darts at the same time and to get a perfect symmetry between both halves of the garment. [00:24:00] That's one of the reasons why you put your, um, you put your PA your tracing paper between both layers of your cut garment. Now this is course is gonna depend how you cut. I cut my garments out. So that the right side faces me the right side faces out instead of right.
[00:24:20] Lisa Woolfork: Sides together. Sometimes I think it'll be great to sew a, to cut out a garment wrong sides together because then it's ready to go. All you do is pick it up off the cutting table and bring it to the sewing machine. But that's not very helpful. If you have anything you need to mark on it. Um, because you're not gonna mark your darts on the outside.
[00:24:37] Lisa Woolfork: You're not gonna mark your dots and plea marks on the outside, unless it says so. Um, so for the most part, um, I've marked my. Materials or my, um, the structural changes that come from darts and pleats on the inside. So that's why I chose to do that. But thet lets you mark your, your dots both at the same time on the inside [00:25:00] in the same way that using a tracing wheel does us.
[00:25:02] Lisa Woolfork: So I just wanted to mention that because the key to remember for this wax free paper is that it works with pressure. that's how it works. And so if you don't, even if you don't have a T it, if you happen to have a bone folder or a point Turner or a stylist, or even a purple Fang, you know, that purple Fang, uh, I'll try to include notes to all these things in the, um, show notes, but a purple Fang is like, uh, plastic stylist type tool that's used to help feed, um, Recalcitrant materials under your presser foot.
[00:25:35] Lisa Woolfork: It's also good for turning collars and stuff like that. I don't have one, but people that have one, like they love it. I have enough other things that I can use instead of the purple Fang, but the purple thing also is a multi-use tool. So you could use that by just rubbing it on top of the first top layer of your fabric.
[00:25:55] Lisa Woolfork: The pressure will go through both layers of the, um, wax [00:26:00] free tracing paper and give you a dot. In the same spot on both sides. Of your garment. And that again is important because I think precision is key for, um, for me, at least for that kind of sewing. I also wanted to share a bit of information about, so if you wanted to add marks to just one side of your garment, if there, there are times when you want to.
[00:26:27] Lisa Woolfork: Just add your marks on the outside sometimes, um, pleats and gathers and stitching and stitching lines, all of these things pockets, for example, um, pocket, if you, especially, if you're do in a patch pocket, they will have the description of that pocket or the outline of that pocket on the pattern. And you wanna transfer that and you want it, of course, to be even cuz you don't wanna have, you know, like a Gordon Gare.
[00:26:54] Lisa Woolfork: With, you know, one pocket up this way and one pocket down the other way on both sides. So [00:27:00] that's another way that you can do that. And so what I do in that case is the reverse. I will take the right sides of my garment. I will put the right sides together of those cut pieces. Then put the two layers of tracing paper in between and just do the reverse of what I just described.
[00:27:17] Lisa Woolfork: I will, I will trace over it so that, and I don't usually do the entire. You or outline shape of a pocket when I'm tracing or marking it, I'll just try to do like the top two sides. Um, and so that's just, it just gives me a guideline without having to worry about getting rid of marks on the outside or whatever.
[00:27:40] Lisa Woolfork: Um, but sometimes a lot of cleats require that. And one of the things that I like about this, um, tracing wheel, the one that's a solid as well as a perforated or serrated is that you can again trace the dotted. To the solid lines. So when they say, you know, I've sewn some patterns that I felt like had 15 [00:28:00] freaking pleats at the neck line and it's like, okay, move the solid line to your dotted line, move your solid line to it's like, oh my gosh.
[00:28:09] Lisa Woolfork: Um, I know there's probably other ways to do this. Of course you can mark, you know, two and a half inch increments you could use dots. You could do, you could, you could use your marking. Um, Pens or whatever. Um, but for me, I do like having the, the C or the wax free tracing paper because I can see it. And for me, since I sew with a lot of bright, bright colors, it's nice to be able to see.
[00:28:36] Lisa Woolfork: The marks that I've made, even through the bright colors of the fabrics that I'm sewing. We're gonna take another quick, quick break. And when we come back, I'm gonna talk about how you can use your tracing wheel without the. Any wax free paper at all. Stay tuned. Hello stitchers. I wanted to share with you that we have [00:29:00] recently hit 30,000 downloads on the stitch please podcast.
[00:29:04] Lisa Woolfork: We are excited and have a lot of enthusiasm behind the project, and I wanna thank each and every one of you for making that happen, we would never have reached 30,000 downloads if it were not for you. So. So much for listening. Thank you for being here and thank you for sharing the stitch, please podcast among your sewing friends.
[00:29:24] Lisa Woolfork: Coming up later this month, we've got some pretty exciting episodes about pattern, organization and bra making. So stay tuned, continue to listen to the podcast. Follow us at black women's stitch on Instagram, and we will continue to help you get your stitch together. Thank you.
[00:29:44] Lisa Woolfork: Welcome back everybody. Thank you. We, you are listening to the stitch please podcast the official podcast of black women's stitch. And we are talking today about wax and wheels. And in this final segment of the program, I wanted to discuss how you could use wax and wheels, [00:30:00] which is the subject of this episode to improve your sewing overall, to help you get your stitch together, as we like to say, but there's also a way to use.
[00:30:07] Lisa Woolfork: Without any tracing paper at all. And I think that this is, this was very exciting to me because it allowed me to stretch and extend my own boundaries about how I practice my sewing. So I made this dress. I was inspired by so, so Stacy, who is a sewist on Instagram. I believe she's part of Atlanta sewing style.
[00:30:29] Lisa Woolfork: Hey Stacy. Um, she sold, she was the first person that I saw who sold Cynthia row's simplicity. 9 0 1 2. I'm gonna describe the dress. It is a loose fitting, a shaped, um, multi puffy sleeves with like ruffle around the neck line, ruffle around double ruffle at the sleeve or a single ruffle. It has two views.
[00:30:56] Lisa Woolfork: One view is a blouse view and one. [00:31:00] Is a dress view and you can taper in the waist with a sash or not. I think that I did not do the sash for mine. I don't recall, but I saw Stacy in hers and I thought it was really beautiful. I had, I already owned the pattern because I have a problem and cannot stop buying patterns.
[00:31:18] Lisa Woolfork: So I was really sad that like, I couldn't go get this pattern because, um, just of so many different things going on and I was like, oh, Boohoo. And I was like, wait a minute, you already got 50 11 million patterns. What are you crying about? Um, that was a quick digression, but I do, I did have this pattern. I saw someone whose work I admire had made it and I was like a.
[00:31:39] Lisa Woolfork: I'm going to make it. I had the perfect pad, the perfect fabric already picked out. I was gonna make it for the spring. Um, because this fabric that I found was from fabric Mart. And I know a lot of people know, and like fabric Mart, a lot of people blog for fabric Mart. This is a shop. In sinking, [00:32:00] spring, Pennsylvania.
[00:32:01] Lisa Woolfork: Um, they have a very strong online presence and a sewing friend, and I actually happened to go there in person last summer. And so. The the, the restraint was not with your girl. Y'all I was, I was not restrained in any way when I was at that shop and to see, to see it in person after, you know, shopping online and reading so much about it, people were very friendly.
[00:32:27] Lisa Woolfork: It was, it was a nice visit. And during the visit, I bought us several, several yards of this white. Um, it feels like a cotton sat, but it's also embroidered with lemon and lemon slices on it. I believe it's by the designer, Millie, M I L L Y because I think her name was written somewhere on the salvage. Um, but this, it was so nice.
[00:32:55] Lisa Woolfork: It felt like a pretty stable or hearty Batiste, you know, Batist is [00:33:00] this really light, sheer, see through cotton fabric, this felt lightweight. But it also was very smooth and the embroidery was so nice, so nice. I was like, oh, this is gonna be my lemonade dress. Oh my gosh, this is gonna be so nice. And so I cut it out and of course it's is a very simple pattern.
[00:33:17] Lisa Woolfork: It's really just, I'm just going for my imagination. Trying to remember, I think it's one, one piece for the front one piece for the back one sleeve, that's almost like a Raglin and then there's an embellishment that. At the bottom, the lower third of the sleeve, where you make a ruffle and you stitch that on top of the sleeve before you do your scene.
[00:33:41] Lisa Woolfork: And so this is one of those occasions that requires that you mark your fabric on the outside. I think one of the most, um, One of the most interesting or pretty design features of this dress, is that slightly, that really cute, slight ruffle around the neck [00:34:00] line? Um, I think it's just really pretty and I think it's not like it's not huge.
[00:34:04] Lisa Woolfork: It's not too much. It's not overpowering. It's very balanced with the dress overall. I. But in order to get it right, you are gonna have to follow a certain line on the outside. And so I knew I had to mark that on the outside. I knew I had to mark the, um, the sleeve on the outside as well. And so to do that, I needed to market.
[00:34:25] Lisa Woolfork: So my first thought my first thought was to use the fion pins that I love. Um, you, I mentioned this in a previous episode about the fion pins and something I say to people when I'm given this advice and this holds true for this wax free tracing paper as well, always. Test it, you know, when we cut out fabrics, because when we cut out patterns, we always end up with scraps.
[00:34:48] Lisa Woolfork: I always save those scraps in case something goes sideways in the sewing process, and I need to recut something. So you don't throw it all. You don't throw it out until you're done with the garment. And so I use some of those cutting [00:35:00] pieces to those off cuts as I call them. I used those to do my testing.
[00:35:05] Lisa Woolfork: So I tested the ion pins on this white. Fabric. I think I might have used yellow, a yellow marker, the kind of the colors marker. And again, these are like my favorite. This is like my go-to. I love fion pens. I have them in a bunch of different varieties. I have at least 30 at least. Cause I think I bought two 18 pack bundles.
[00:35:30] Lisa Woolfork: Um, I like them that much. However. I went to write, actually wrote the word test on the fabric on the white fabric. And I took my hot iron and I put it down and yes, the word test did disappear. However it left a trace, a residue of the word test right there on the fabric. I was really surprised by [00:36:00] this. I had not exp and I know that many people, not many people.
[00:36:04] Lisa Woolfork: I know that some people have said that the markers do, they come back in the cold. I've never had that experience. Um, but they, but I have had these. Experience of what they call ghosting. So you try, you put, you, you use your fion marker, you iron it, you take it away and there's a trace element of whatever you marked, that's still left behind from the heat.
[00:36:27] Lisa Woolfork: And so this is why this doesn't mean that I'm not gonna use Fon pens. I obviously will and continue to do so to this day. It's just important that you test everything. And so in this test, the fion failed. And so, and I knew I did not want to. Using a, um, I didn't wanna risk using the wax free paper because it's white fabric.
[00:36:50] Lisa Woolfork: I mean, just like just the thought of rolling that wax, even in a light way, in a light pink or in yellow, I did not want to, [00:37:00] I didn't want it to, I wanted to make sure it would go, you know what I'm saying? I do believe this wax free stuff disappears. I believe all that to be true, but I also didn't have the time to like, What I would do, what I would recommend.
[00:37:15] Lisa Woolfork: This is one of those do, as I say, not as I do kind of moments, I would recommend taking your wax paper, your wax free tracing paper, putting it on your garment in the way or on your scraps or your offshoot off cuts in the way that you would plan to do normally then wash it in the washing machine or clean it in whatever way you plan to normally clean your fabrics.
[00:37:37] Lisa Woolfork: Then you could see if it would really go away or. I did not have time to do that. Very sensible thing. I did not have time to, well, I guess I had the time, I just didn't want to, you know, how you get really excited about making something and you're like, oh, I just wanna go ahead and get it done. And so I was like, I'm gonna find another way to mark this fabric on the outside.
[00:37:57] Lisa Woolfork: I'm gonna find another way to mark this [00:38:00] white fabric on the outside. And I did. This is what I did. I laid my pattern pieces down on top of the garments, you know, on, on top of the components that have been cut already. So for example, usually when I have to do markings, I do them after I've cut out all the pattern pieces.
[00:38:18] Lisa Woolfork: So for this one, you had to attach the ruffle on the outside of the sleep. And so what I did was I took. I, I took my wheel, my rated wheel and I put, I took the, the two pieces for the sleeve. They were wrong sides together, right. Sides out, cuz that's tend, that tends to be how I work with my fabric. And I put the pattern piece down.
[00:38:44] Lisa Woolfork: I then put some heat transfer tape or the heat, um, the heat resistant tape that I mentioned earlier again, I throw it in the show notes, the heat resistant tape on top of that line, because again, when working with tissue paper patterns, They do tear easily. And [00:39:00] so if you run a perforated disc alongside or on top of tissue paper, what's gonna happen, it is going to rip or it's gonna become weaker in integrity.
[00:39:10] Lisa Woolfork: So I take a piece of heat transfer tape. I ran it. I put it on top of that stitching line. And so all I had to do then was smooth everything out, take my serrated tracing wheel and roll it right on top of that stitching line. When I peeled that tissue paper pattern back, what did I have? I had two dotted lines that were simply.
[00:39:36] Lisa Woolfork: With the pressure of the wheel, the result was a slightly dotted indentation along the fabric. I don't know why this made me so happy, but I was so chuffed. Chuffed was a word that some of my, um, British folks and friends have taught me. It means really happy. I was. [00:40:00] Pretty chuffed at that. I have figured out how to make this, um, dotted line on this white again, white fabric.
[00:40:09] Lisa Woolfork: The reason I'm stressing this white fabric thing is because I have long had this ever since I used to watch scandal on ABC with Carrie Washington. Um, I have had this desire to make and wear. Coat cuz she wears white coats and she wears white tops and she wears white garments and she wears white slacks.
[00:40:29] Lisa Woolfork: And I am not about that white garment life. I would like to be that's aspirational for me, but I'm really messy. Well maybe not really messy. I'm, um, I'm really human. How about that? I'm really human. And part of my humanity takes the form of drinking coffee and then being startled and then spilling set coffee along the sleeve in my brand new white shirt.
[00:40:50] Lisa Woolfork: Or I remember once I did actually have a pair of ivory striped. Pants that I got from the banana Republic. And I went to pick up my child, my youngest from preschool, and [00:41:00] I picked him up and was swinging them and giving him so much love. And he took his two muddy shoe prints and put them on either one of my thighs on both of my thighs, like standing.
[00:41:09] Lisa Woolfork: So my white pants had two little tiny red footprints on them, and that is pretty much the story of my life with. Garments. And so I'm trying again, because my youngest child is now 16 years old and way too big to pick up and put footprints on my legs. So I'm like, okay, this is my time. It is my time to wear this dress.
[00:41:32] Lisa Woolfork: And so I was very happy to be able to use the wheel for, um, to perforate the fabric in a way or not to perforate,
[00:41:40] cuz
[00:41:40] Lisa Woolfork: it didn't leave. There were no holes. It was just a faint, dotted line. The holes were not raised on the reverse side. It was just this impression. And I had to then, and then it was so faint that I could hardly see it until I needed to.
[00:41:56] Lisa Woolfork: And that is what I believe you want. In your fabric and [00:42:00] pattern markings, you don't want to see them from the outside. You don't want to see them. Um, when you're putting your pocket on it, you can still see where that mark was. You want 'em to be completely concealed. And for me, it, this was almost like that great feeling.
[00:42:15] Lisa Woolfork: When you put in a, an invisible zipper really well, you know how, when you zip it up and it looks good and you can't even tell there's a zipper in there. That's what this kind of felt like to me, it was very, very satisfying. And of course, this is something that I recommend for. White fabrics or very, very, very light colored fabrics.
[00:42:36] Lisa Woolfork: And they should be stable wovens, um, Batiste cotton lawn, perhaps, um, shirts, things that are tightly, tightly woven that will once you're done. You can press out the marks and it's no harm, no foul. Um, and so I just wanted to end on that note that there is so many ways that we can use, um, tracing [00:43:00] wheels in our sewing, and we can use wax free tracing paper.
[00:43:03] Lisa Woolfork: Um, In, in ways that are really creative. And I was also, again, very happy to be able to find out a way to use this tracing wheel that did not involve any tracing medium at all. So that's today's episode on wax and wheels. You've been listening to the stitch please podcast, and we're grateful for that. Um, stay tuned and check us out on all our socials and we will be.
[00:43:27] Lisa Woolfork: Next week. Thank you for joining us for this week's episode of the stitch. Please podcast the official podcast of black women's stitch, the sewing group, where black lives matter. There are a variety of ways that you can support the program and you're doing it right now by listening to the pro, by listening to the podcast, it does help us grow another way to do that.
[00:43:51] Lisa Woolfork: Is to rate the podcast, review it, subscribe to it. All of these things are ways that you can support the podcast without having to spend [00:44:00] any money at all. If you would like to spend some money to support us, there are ways to do that as well. You can make direct donations to our Patreon site for monthly contributions, as well as one time contributions to.
[00:44:13] Lisa Woolfork: Cash app or Venmo. And finally, we have another cute, very adorable way for you to support the black women's stitch project. It's a pin, a P I N enamel lapel pin. That's very cute. It's about two inches wide and one and a half inch tall. And it's of the black women's stitch logo. And that is $15. With free shipping to the us.
[00:44:38] Lisa Woolfork: And so if you drop $15 in the, a PayPal, Venmo or cash app accounts, and then send me your email. Oh, not email, you send me your mailing address to my email either at black women's stitch@gmail.com or you send me a direct message on the black woman stitch Instagram page, we will [00:45:00] put the pin in the mail to.
[00:45:02] Lisa Woolfork: Um, again, free shipping, $15 for the pin and all of this goes to support the black women's stitch project. Thank you again for joining us this week. Come back next week and we will help you get your stitch together.